All you need to know before training a Text Recognition model: how to select the Training and Validation Data, add a base model and set up any advanced settings
Previous step: Data Preparation
Once you have your Ground Truth pages ready, it is time to train a Text Recognition model.
You can start the training directly from the collection or document(s) you've been working on. Simply mark the transcribed or corrected pages, then click on the "Train Model" button in the bar above the images and select "Text Recognition Model".
.png?width=688&height=257&name=Help%20Center%20Borders%20(1).png)
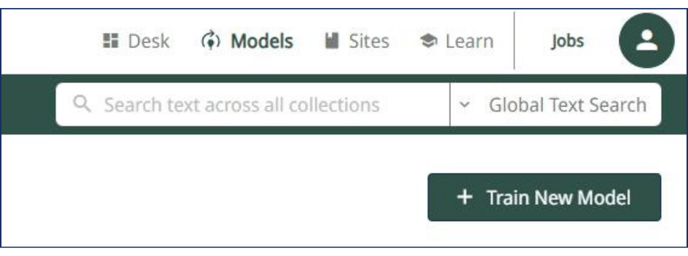
You can also start the training of models by switching from the Desk to the Models view on the right side of the top bar of the page. This is the dedicated AI training dashboard, where you can train not only Text Recognition models, but also Baselines, Field and Table models. Your trained Text Recognition models are displayed under "My Models" by default when opening this page.
On the right side, click on the button " + Train New Model" to choose the type of model you want to train.
After clicking on "Text Recognition Model", the training configuration window will open up.
If you haven't already, you need to select the collection containing your Ground Truth document(s) to mark it as the "Training Data". Via the search bar, you can type in the collection title or collection ID and select it.
Be aware that you can not select documents from different collections during the training. To overcome this problem, before starting the training, it is possible to create shortcuts from documents belonging to different collections to a single collection, as explained on the Managing Documents page.
After having chosen the correct document(s), the proper training configuration starts.
.png?width=688&height=193&name=Design%20ohne%20Titel%20(1).png)
Step 1: Training Data

During the training, the Ground Truth pages are divided into two groups:
- Training Data: set of examples used to fit the parameters of the model, i.e. the data on which the knowledge in the net is based. The model is trained on those pages.
- Validation Data: set of examples that provides an unbiased evaluation of a model, used to tune the model‘s parameters during the training. In other words, the pages of the Validation Data are set aside during the training and are used to assess its accuracy.
Choose first the pages to be included in the Training Data.
By ticking the box of the document title, you can select all the transcriptions available in the whole document. But you can also choose separate pages by clicking on "Select Pages" and ticking all pages you want to include in the training and then clicking "Save and go back".
Here, you can also filter for the status of the selected pages - by default, the "latest transcription" is selected (regardless of the status in which they were saved) but you could also only take pages with the status "Ground Truth" into account. Pages which do not contain any transcription can not be selected. 
Once you're happy with the selection of the Training Data, click on "Next".
Step 2: Validation Data

Select the pages to assign to the Validation Data.
Remember that the Validation Data should be representative of the Ground Truth and comprise all examples (scripts, hands, languages…) included in the Training Data. Otherwise, if the Validation Data is too little varied, the measurement of the model’s performance could be biased.
We recommend not to save effort at the Validation Set and assign around 10% of your Ground Truth transcriptions to it.
You can select the pages manually or assign them automatically. The manual selection works as described above for the Training Data. Only the pages that contain text and have not been included in the Training Data are selectable.
With the automatic selection, 2%, 5% or 10% of the Training Data is automatically assigned to the Validation Data: in this case, simply click on the percentage you want to assign. The automatic selection is recommended to have more varied Validation Data.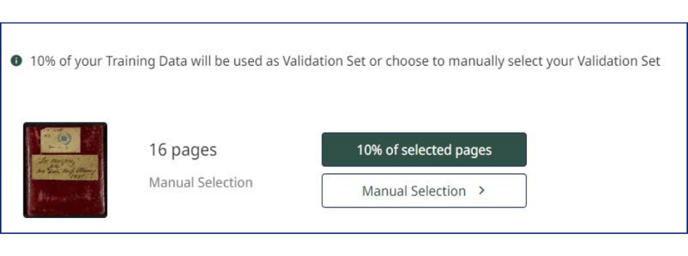
Step 3: Model Setup

The first information you are asked to enter is the model metadata, in detail:
- Model Name (chosen by you);
- Description of your model and the documents on which it is trained (material, period, number of hands, how you have managed abbreviations…);
- Image URL (optional);
- Language(s) of your documents;
- Time span of your documents.
This metadata will help you to later filter the search bar and find a model more easily.
Base Model:
Existing models can be used as starting point to train new models. When you select a Base model, the training does not start from scratch but from the knowledge already learnt by the base model. With the help of a base model, it is possible to reduce the amount of new Ground Truth pages, thus speeding up the training process. Likely, the base model will also improve the quality of the recognition results.
The benefit of a base model, however, is not always guaranteed and has to be tested for the specific case. To use a base model, simply select the desired one. You can select one of the public models or one of your own PyLaia models. Remember that, to be beneficial, the base model must have been trained on a writing style similar to the one of your model..png?width=688&height=130&name=Model%20Set%20UP%20(1).png)
Advanced Settings (optional):
The last section contains an overview of the model configuration.
.png?width=688&height=312&name=Model%20Set%20UP%20(4).png)
Here, at the bottom of the page, you can modify the advanced parameters:
-
- Training cycles:
This refers to the number of "epochs", which can be understood as the number of times that the learning algorithm will go through the entire Training Data and evaluate itself on both the Training and the Validation Data. The number in this section indicates the maximum number of trained epochs because the training will be stopped automatically when the model no longer improves (i.e. it has reached the lowest possible CER).
To begin with, it makes sense to stick to the default setting and not enter any value - this way, 100 epochs will be used as a starting point. - Early Stopping:
This value defines the minimum number of epochs for the training, meaning the model will at least run this many epochs.
Completed these epochs, if the CER of the Validation Data continues to decrease, the training will continue and end automatically when the model no longer improves.
On the other hand, if the CER does not go down anymore, the training will be stopped.
In other words, with the early stopping value, you force the model to train at least that number of epochs.
For most of the models, the default setting of 20 epochs works well, and we recommend leaving it as it is for your first training.
When there is no or little variation in the Validation Data, the model may stop too early.
For this reason, we recommend creating varied Validation Data containing all types of hands and document typologies present in the Training Data. Only if your Validation Data is rather small, increase the “Early Stopping” value in order to avoid the training from stopping before it has seen all the Training Data. Always bear in mind, however, that by increasing this value the training will take longer. - Reverse text (RTL):
Use this option to reverse text during the training when the writing direction in the image is opposite to that of the transcription, e.g. the text was written right-to-left but transcribed left-to-right. - Use existing line polygons for training:
If you check this box, the line polygons will not be computed during the training and instead, the existing ones will be used. When using this model for recognition afterwards, similar line polygons should be used for the best performance of the model. - Train Abbreviations with expansion:
If in the Ground Truth transcriptions, abbreviations are written in their abbreviated form and expanded in the property "expansion" (property of the Abbreviation Tag), check this option to obtain the best results. - Omit lines by tag 'unclear' or 'gap':
If you've used the tags "unclear" or "gap" in the Ground Truth transcription to indicate words or phrases that should not be included in the training, select the respective option. Please be aware though, that not only the tagged words/phrases will be omitted from the training data but the whole line containing such a tag.
- Training cycles:
Step 4: Summary & Start

By clicking "Next", you have made it to the last stage of the training configuration.
Here, you find a final overview of the setup of your text recognition model, which you can check once again and also go back to change any settings or parameters.
After checking all the details, click Start to launch the training job.
.png?width=688&height=108&name=Model%20Set%20UP%20(3).png)
You can follow the progress of the training by checking it via the “Jobs” button on the right side of the top menu bar. Click on "Open Full Jobs Table" to see the details of the job.
.png?width=495&height=58&name=Model%20Set%20UP%20(5).png)
The completion of every epoch will be shown in the job description, and you will receive an email once the training process is completed. Depending on the traffic on the servers and the amount of material, your training might take a while.
In the Jobs table, you can check your position in the queue (i.e. the number of training jobs ahead of yours). You can perform other jobs in Transkribus or close the platform during the training process. If the job status is still stated as “Created” or “Pending”, please don’t start a new training, but just be patient and wait.
You can easily check the current and past availability status of Transkribus on this page.
This provides real-time updates on the system's uptime and any outages. It allows you to quickly verify if all essential services are running smoothly. Initially, we are monitoring the most critical services, and we will gradually include additional services over time.
After the training is finished, you can use your model to recognise new documents, as explained on this page.
Read the Managing Models page to learn how to manage and share models.
Next step: Automatically transcribing your documents
Transkribus eXpert (deprecated)
Once you have your Ground Truth pages, it is time to train the Text Recognition model.
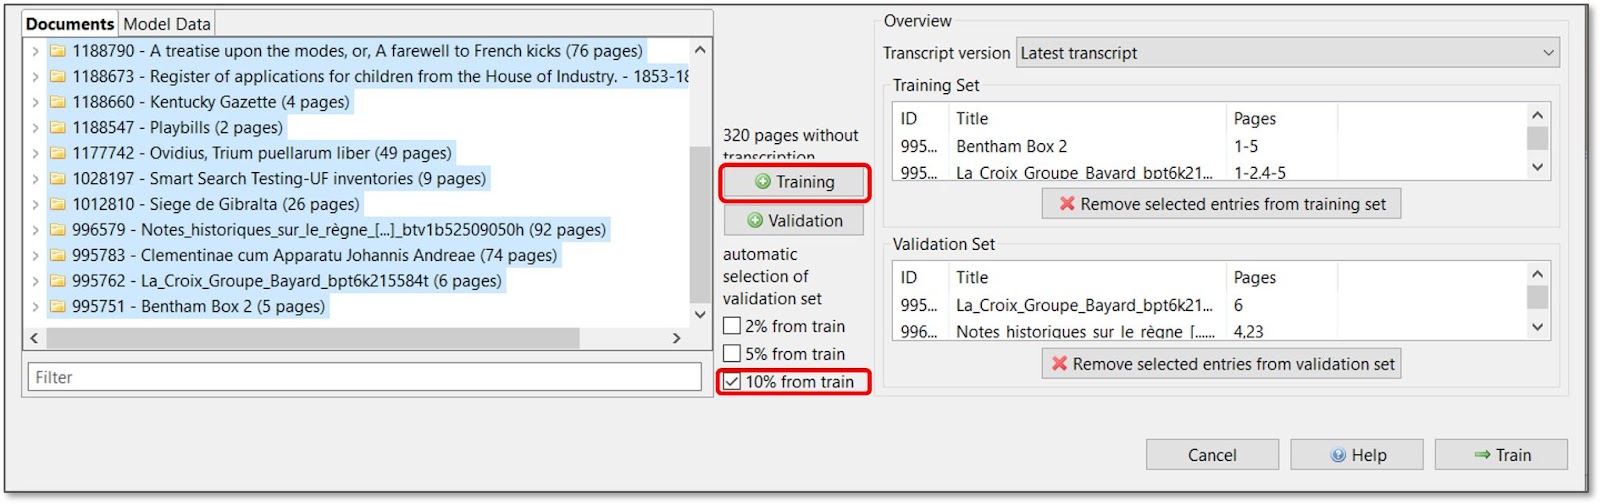
Click on the “Tools” tab. Under the “Model Training” section, click on “Train a new model”. The Model Training window pops up. By default, “PyLaia HTR”, the engine we are interested in to train the Text Recognition model, is selected, as shown in the figure below.
1. Model Setup
In the upper section, you will need to add details about your model:
- Model Name (chosen by you);
- Language (of your documents):
- Description (of your model and the documents on which it is trained).
2. Training Set
During the training, the Ground Truth pages are divided into two groups:
- Training Set: set of examples used to fit the parameters of the model, i.e. the data on which the knowledge in the net is based. The model is trained on those pages.
- Validation Set: set of examples that provides an unbiased evaluation of a model, used to tune the model‘s parameters during the training. In other words, the pages of the Validation Set are set aside during the training and are used to assess its accuracy.
In the lower part of the window, first, select the pages that you would like to include in your Training Set.
To add all the pages of your document, select the folder and click “+Training”.
To add a specific sequence of pages from your document to the Training Set, double-click on the folder, click on the first page you wish to include, hold down SHIFT on your keyboard and then click the last page. Then click “+Training”.
To add individual pages from your document to the Training Set, double-click on the folder, hold down CTRL” on your keyboard and select the pages you would like to use as training data. Then click “+Training”.
The pages you have selected will appear in the “Training Set” space on the right.
Above it, you can decide which transcription version you want to use for both the Traning Set and the Validation Set: latest transcript, Ground Truth only or initial transcript. With the first option, all the latest transcripts, regardless of how they were saved, are displayed and can be selected for training. If you choose “Ground Truth only”, only the pages saved as Ground Truth are selectable.

3. Validation Set
Remember that the Validation Set should be representative of the Ground Truth and comprise all examples (scripts, hands, languages…) included in the Training Set. Otherwise, if the Validation Set is too little varied, the measurement of the model’s performance could be biased.
We recommend not to save effort at the Validation Set and assign around 10% of your Ground Truth transcriptions to it.
To add pages to the Validation Set, follow the same process explained above for the Training Set but click the “+Validation” button.
You can also automatically assign 2%, 5% or 10% of the Training Set to the Validation Set. Select the pages to add to the Training Set, flag the percentage you want to assign to the Validation Set and click the “+Training” button.
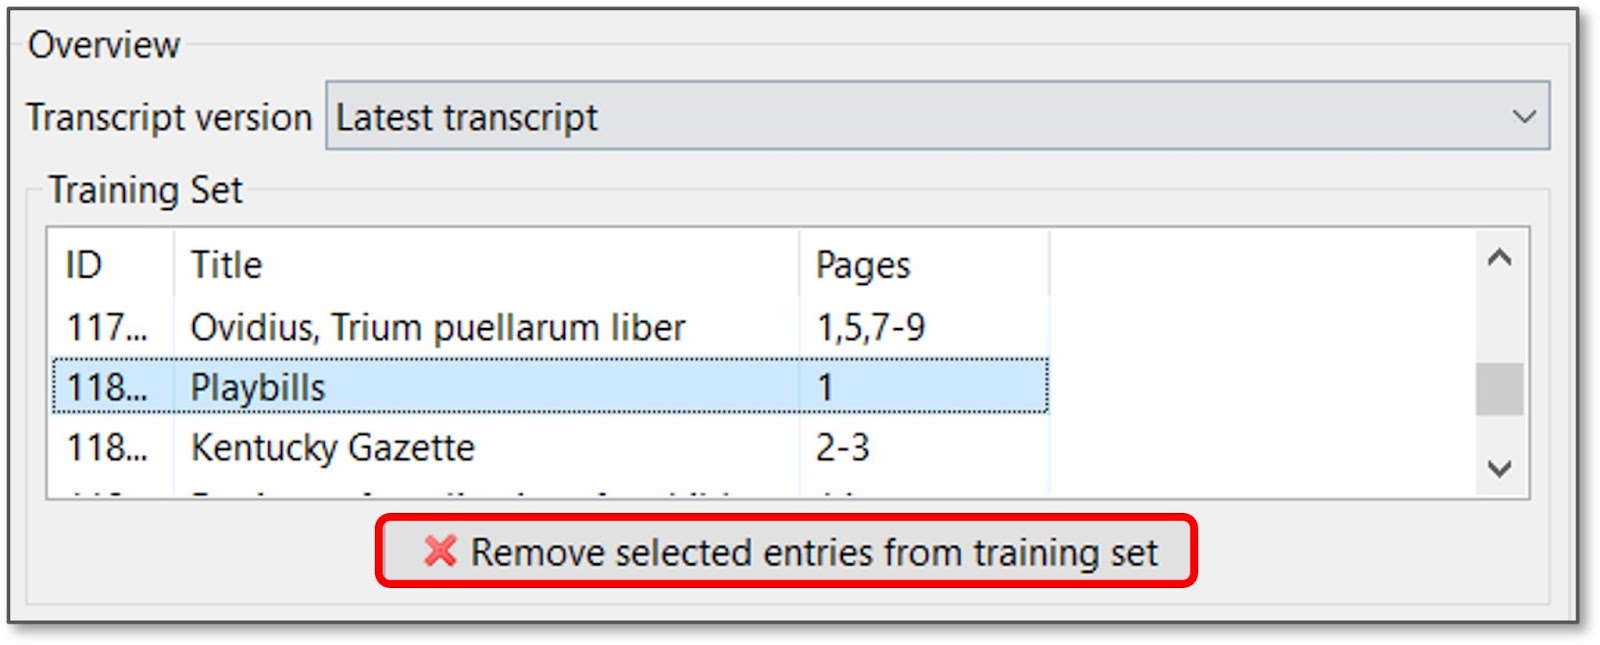
To remove pages from the “Training Set” or “Validation Set”, click on the page and then click the red cross button.
4. Engine
PyLaia is the Text Recognition engine available within Transkribus. When you train a Text Recognition model, it is trained with PyLaia.
In the future, we hope to implement new architectures in Transkribus and offer more text recognition solutions to the users.
5. Advanced Parameters
The parameters for the PyLaia engine in Transkribus eXpert are divided into two groups:
- “Standard Parameters” (in the upper right section of the window, under “Language”);
- “Advanced Parameters” (accessible by clicking on the button at the bottom of the Parameters section).
Standard Parameters:

In detail, they are:
- Max-nr. of Epochs:
The number of epochs refers to the number of times the learning algorithm will work through the entire Training Data and evaluate itself on both the Training and the Validation Data.
You can increase the maximum number of epochs, but be aware that the training process will take longer. Furthermore, note that the training will be stopped automatically when the model no longer improves (i.e. it has reached the lowest possible CER). To begin with, it makes sense to stick to the default setting of 250. - Early Stopping:
This value defines the minimum number of epochs for the training: the model will at least run this many epochs.
Completed these epochs, if the CER of the Validation Data continues to decrease, the training will continue and end automatically when the model no longer improves. On the other hand, if the CER does not go down anymore, the training will be stopped.
In other words, with the early stopping value, you force the model to train at least that number of epochs.
For most of the models, the default setting of 20 epochs works well, and we recommend leaving it as it is for your first training.
When there is no or little variation in the Validation Set, the model may stop too early. For this reason, we recommend creating a varied Validation Set containing all types of hands and document typologies present in the Training Set.
Only if your Validation Set is rather small, please increase the “Early Stopping”-value in order to avoid the training from stopping before it has seen all the Training Set. But bear in mind that increasing the value, the training will take longer. - Base Model:
Existing models can be used as starting point to train new models. When you select a Base model, the training does not start from scratch but from the knowledge already learnt by the base model. With the help of a base model, it is possible to reduce the amount of new Ground Truth pages, thus speeding the training process. Likely the base model will also improve the quality of the recognition results.
The benefit of a base model, however, is not always guaranteed and has to be tested for the specific case.
To use a base model, simply choose the desired one with the “Choose…” button next to “Base Model”. You can select one of the PyLaia public models or a PyLaia model of yours.
Remember that, to be beneficial, the base model must have been trained on a writing style similar to the one of your model. - Learning Rate:
The “Learning Rate” defines the increment from one epoch to another, so how fast the training will proceed. With a higher value, the Character Error Rate will go down faster. But, the higher the value, the higher the risk that details are overlooked.
This value is adaptive and will be adjusted automatically. The training is influenced though by the value it is started with. You can go with the default setting here. - Image Type:
We have had some cases where the pre-processing took too much time. If this happens to you, you can switch the “Image Type” to “Compressed”.
You can proceed in the following way: start the training with “Original”. When the training has started (“Running” status), every now and then check the progress of the pre-processing with the “Jobs”-button. In case it gets stuck, you can cancel the job and restart it with the “Compressed”-setting.
- Perform binarization:
This option is selected by default. Unflag it and use no binarization only if you have homogenous training data, i.e. pages with the same background colour. Only in this case no binarization can lead to better results. - Use existing line polygons for training:
If you flag this option, line polygons will not be computed during the training (as it happens by default), but the existing ones will be used.
During the recognition, then, similar line polygons should be used for the best performance of the resulting trained model. - Omit lines by tag:
With this option, you can omit lines containing words tagged as “gap” and/or “unclear” from the training. Please note that the whole line will be ignored during the training, not only the unclear word: this happens because the training happens on the line level. - Reverse Text:
Use this option to reverse text during the training when the writing direction in the image is opposite to that of the transcription, e.g. the text was written right-to-left and transcribed left-to-right. You can also decide to exclude digits or tagged text from reversion. - Training Tags:
It is possible to train textual tags and their properties if they are present in the Ground Truth, so that the model will automatically generate tags during the recognition.
This feature works well with abbreviations and text styles and brings the best results for tags which are repeated in the same way (i.e. the same word) very often.
Select “Train Abbreviations with tags” to train the tagged abbreviations (“Abbrev” tag) and the respective “expansion” properties present in your Ground Truth.
For other tags, select the “Train Tags” option and click “Include Properties”. Use the green plus button to enter the list of tags that should be trained. Be aware that here you would be able to select only the tags that have been added to the “Tag Specification” group.
Advanced Parameters:
Users can set several advanced parameters of PyLaia on their own. You can open the advanced parameters by clicking on the “Advanced parameters”-button at the bottom of the standard parameters.
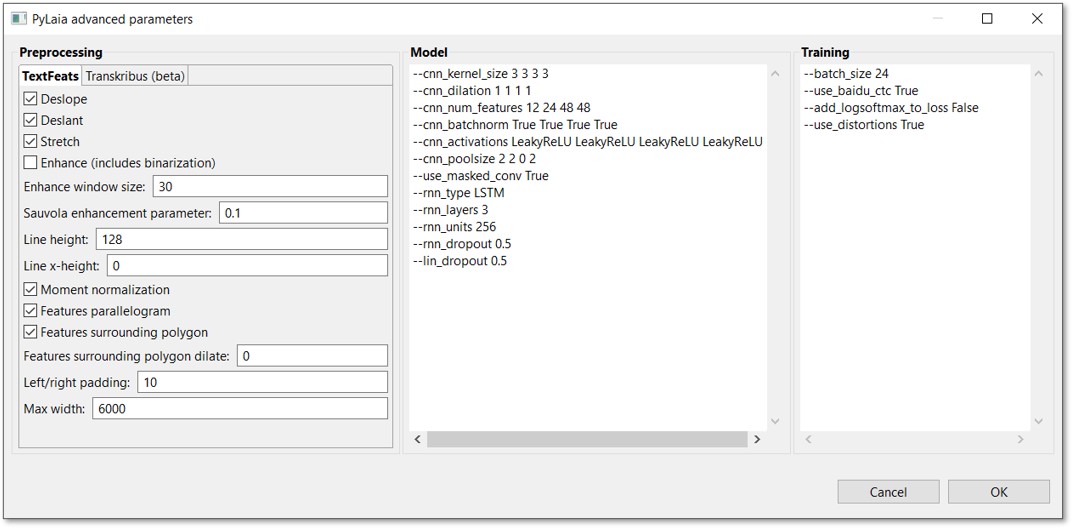
They are divided into three groups: Preprocessing, Model and Training.
- Preprocessing Parameters:
- Deslant: choose this option with cursive writing in order to straighten it. Leave out this option with printed documents because if printed documents contain cursive passages in addition to the normal print characters, the effect can be upside down.
- Deslope: allows more variation at the baselines, e.g. more tolerance at baselines that are not exactly horizontal but slanting.
- Stretch: this option is for narrow writing in order to uncompress it.
- Enhance: that is a window which goes over the baselines in order to optimize passages which are difficult to read. This is useful if you have “noise” in the document.
- Enhance window size: this setting refers to the option just explained and therefore only needs to be set if you would like to use “Enhance”. This setting defines the size of the window.
- Sauvola enhancement parameter: please stick to the default setting here.
- Line height: value in pixels; if you need to increase the pixels of the line, you can do this here. 100 is a good value to go for.
Attention: if the value is too high it might lead to an “out of memory order”. You can bypass this error in turn by lowering the value of the “batch size” (top left in the advanced parameters window), e.g. by half. Please be aware that the lower this value, the slower the training will be. The slow-down of the training relating to the batch size should be improved with the new version of PyLaia, which will set the batch size automatically. - Line x-height: this setting applies to the descenders and ascenders. If you put this value, the "Line height” parameter will be ignored.
- Please don’t change the following four parameters:
Moment normalization
Features parallelogram
Features surrounding polygon
Features surrounding polygon dilate - Left/right padding: 10 (default) means that 10 pixels will be added. This is useful if you are worried that parts of the line could be cut off.
- Max width: maximum width that a line can reach; the rest will be cut off. 6000 (default) is already a high value. If you have huge pages, you can further increase this value.
- Model parameters:
For all those who are familiar with machine learning and the modification of neural nets. Therefore, these parameters are not further explained here.
- Training parameters:
- Batch size: number of pages which are processed at once in the GPU. You can change this value by putting in another number.
- Use_distortions True: the training set is artificially extended in order to increase the variation of the training set and in this way make the model more robust. If you are working on even writing and good scans, you don’t need this option. To deactivate it, please write „False“ instead of „True“.
- The net structure of PyLaia can also be changed – a playground for people who are familiar with machine learning. Modifications on the neural net can be done via the Github repository.
At this point, you can start the training by clicking the “Train” button.
You can follow the progress of the training by clicking the “Jobs” button in the “Server” tab. Depending on the traffic on the servers and the amount of material, your training might take a while. In the “Jobs” window, you can check your position in the queue (i.e. the number of trainings ahead of yours). You can perform other jobs in Transkribus or close the programme during the training process. If the Job status is “created” or “running”, please don’t start a new training, but just be patient and wait.
After the training has started, the completion of every epoch will be shown in the Job description, and you will receive an email when the training process is completed.